
 |
This is what should be in your pack, along with the printed instructions:
Main fabric - this has been over-locked on each end to prevent fraying.
Tummy panel - in contrasting fabric.
Thread and two buttons for eyes.

Showing lining up the tummy panel along the bottom of the main fabric, using the blue guidelines.

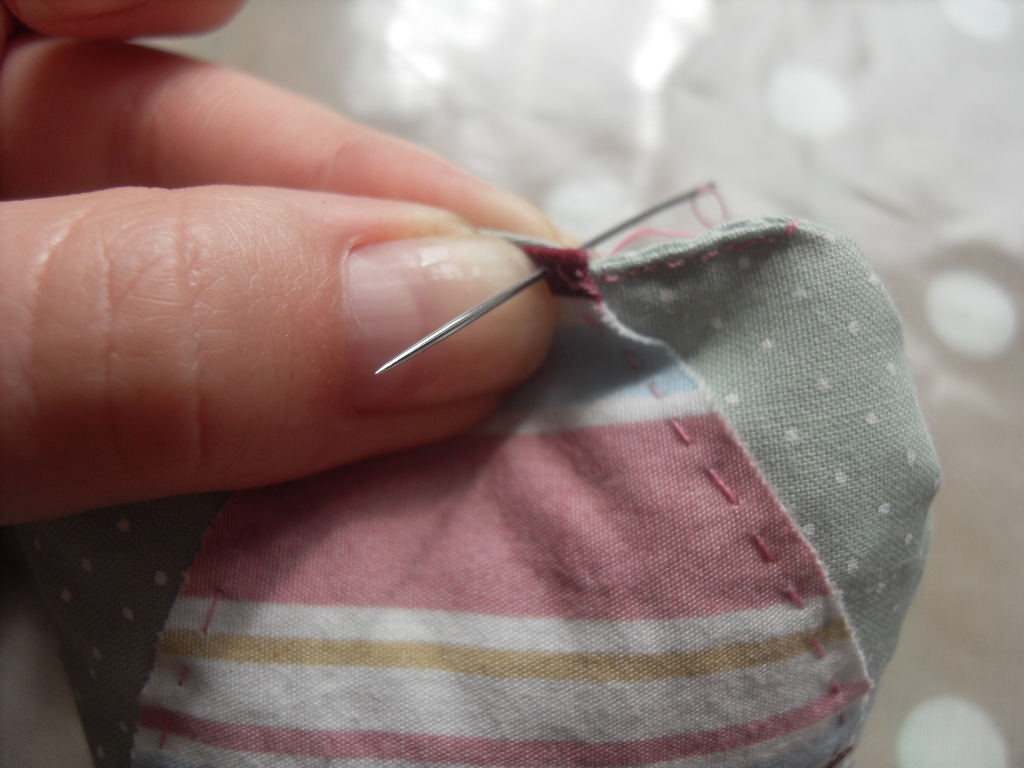
Hand sewing the tummy panel onto the main fabric, using running stitch.

How to fasten off: Turn the fabric over so you can see the back and sew another stitch on top of the last, but before you pull it tight, take the needle through the loop to make a knot.

Repeat and then cut the thread, leaving a little excess.

Fold the top of the fabric down to meet the bottom

Pin the layers together and backstitch round the red outline

Cut round the outline leaving at least a 5mm gap


Turn the owl through the opening at the bootom


Turn the point down by approx 40mm and sew a few stitches UNDERNEATH the beak to secure it to the top layer. Be sure to only stitch through the top layer.

Sewing on the button eyes. Remember to only sew through the top layer of fabric. You can make sure you only have the top layer by putting you fingers in the opening and holding the top layer while you stitch.

Use a rolled up piece of paper or card to make a cone with which to fill your owl

Fill with beans

Tie a knot in your thread and put the needle through the fabric from the inside, where you need to start sewing. Stitches will be just above the white overlocking thread so when sewn up you won't see this, just the back stitch you have used to sew up the opening.

Pinch the folded edges together as you back stitch the opening up
Say Hi to your new Owl Friend!!

To purchase a kit to make your own owl, click the link below to go to our website.